
Planting & Site Selection
Boxwood have always been popular because of their low and easy maintenance. However, the first steps towards making them a low maintenance plant are proper site selection, preparation, and planting. If certain steps are followed, the long-term success and low maintenance of your boxwood garden will be insured.
Proper planting is crucial to the longevity and good health of boxwood. Take the steps outlined below to ensure planting success.
Scroll down or click the images below for details.

Site selection

Cultivar Selection

Drainage

Soil PREPARATION

PLanting

Mulching

Watering
Site Selection
It is extremely important, before you plant boxwood, that you determine the likelihood of success of that garden regarding Boxwood Blight, one of the biggest threats to boxwood today. Even though certain cultivars of boxwood show strong resistance to Boxwood Blight, all cultivars, including NewGen® cultivars, show some susceptibility, particularly when planted in high-risk sites.
A number of factors should be considered to minimize the chances of getting Boxwood Blight:
Choose sites which have had minimal to no Boxwood Blight in the past.
Choose sites which have great air movement, such as the tops of hills.
Avoid planting close to buildings, trees, heavy shrubs, tall and thick perennials, or other objects which restrict air flow.
Avoid planting boxwood close to Boxwood Blight- susceptible cultivars, such as Buxus sempervirens ‘Suffruticosa’ (English Boxwood).
Do not use overhead irrigation.
Boxwood do best when they get intermittent sunlight throughout the day. Some direct sunlight is beneficial to fast drying, so the optimum sight would be a sight that gets morning sun and afternoon shade.

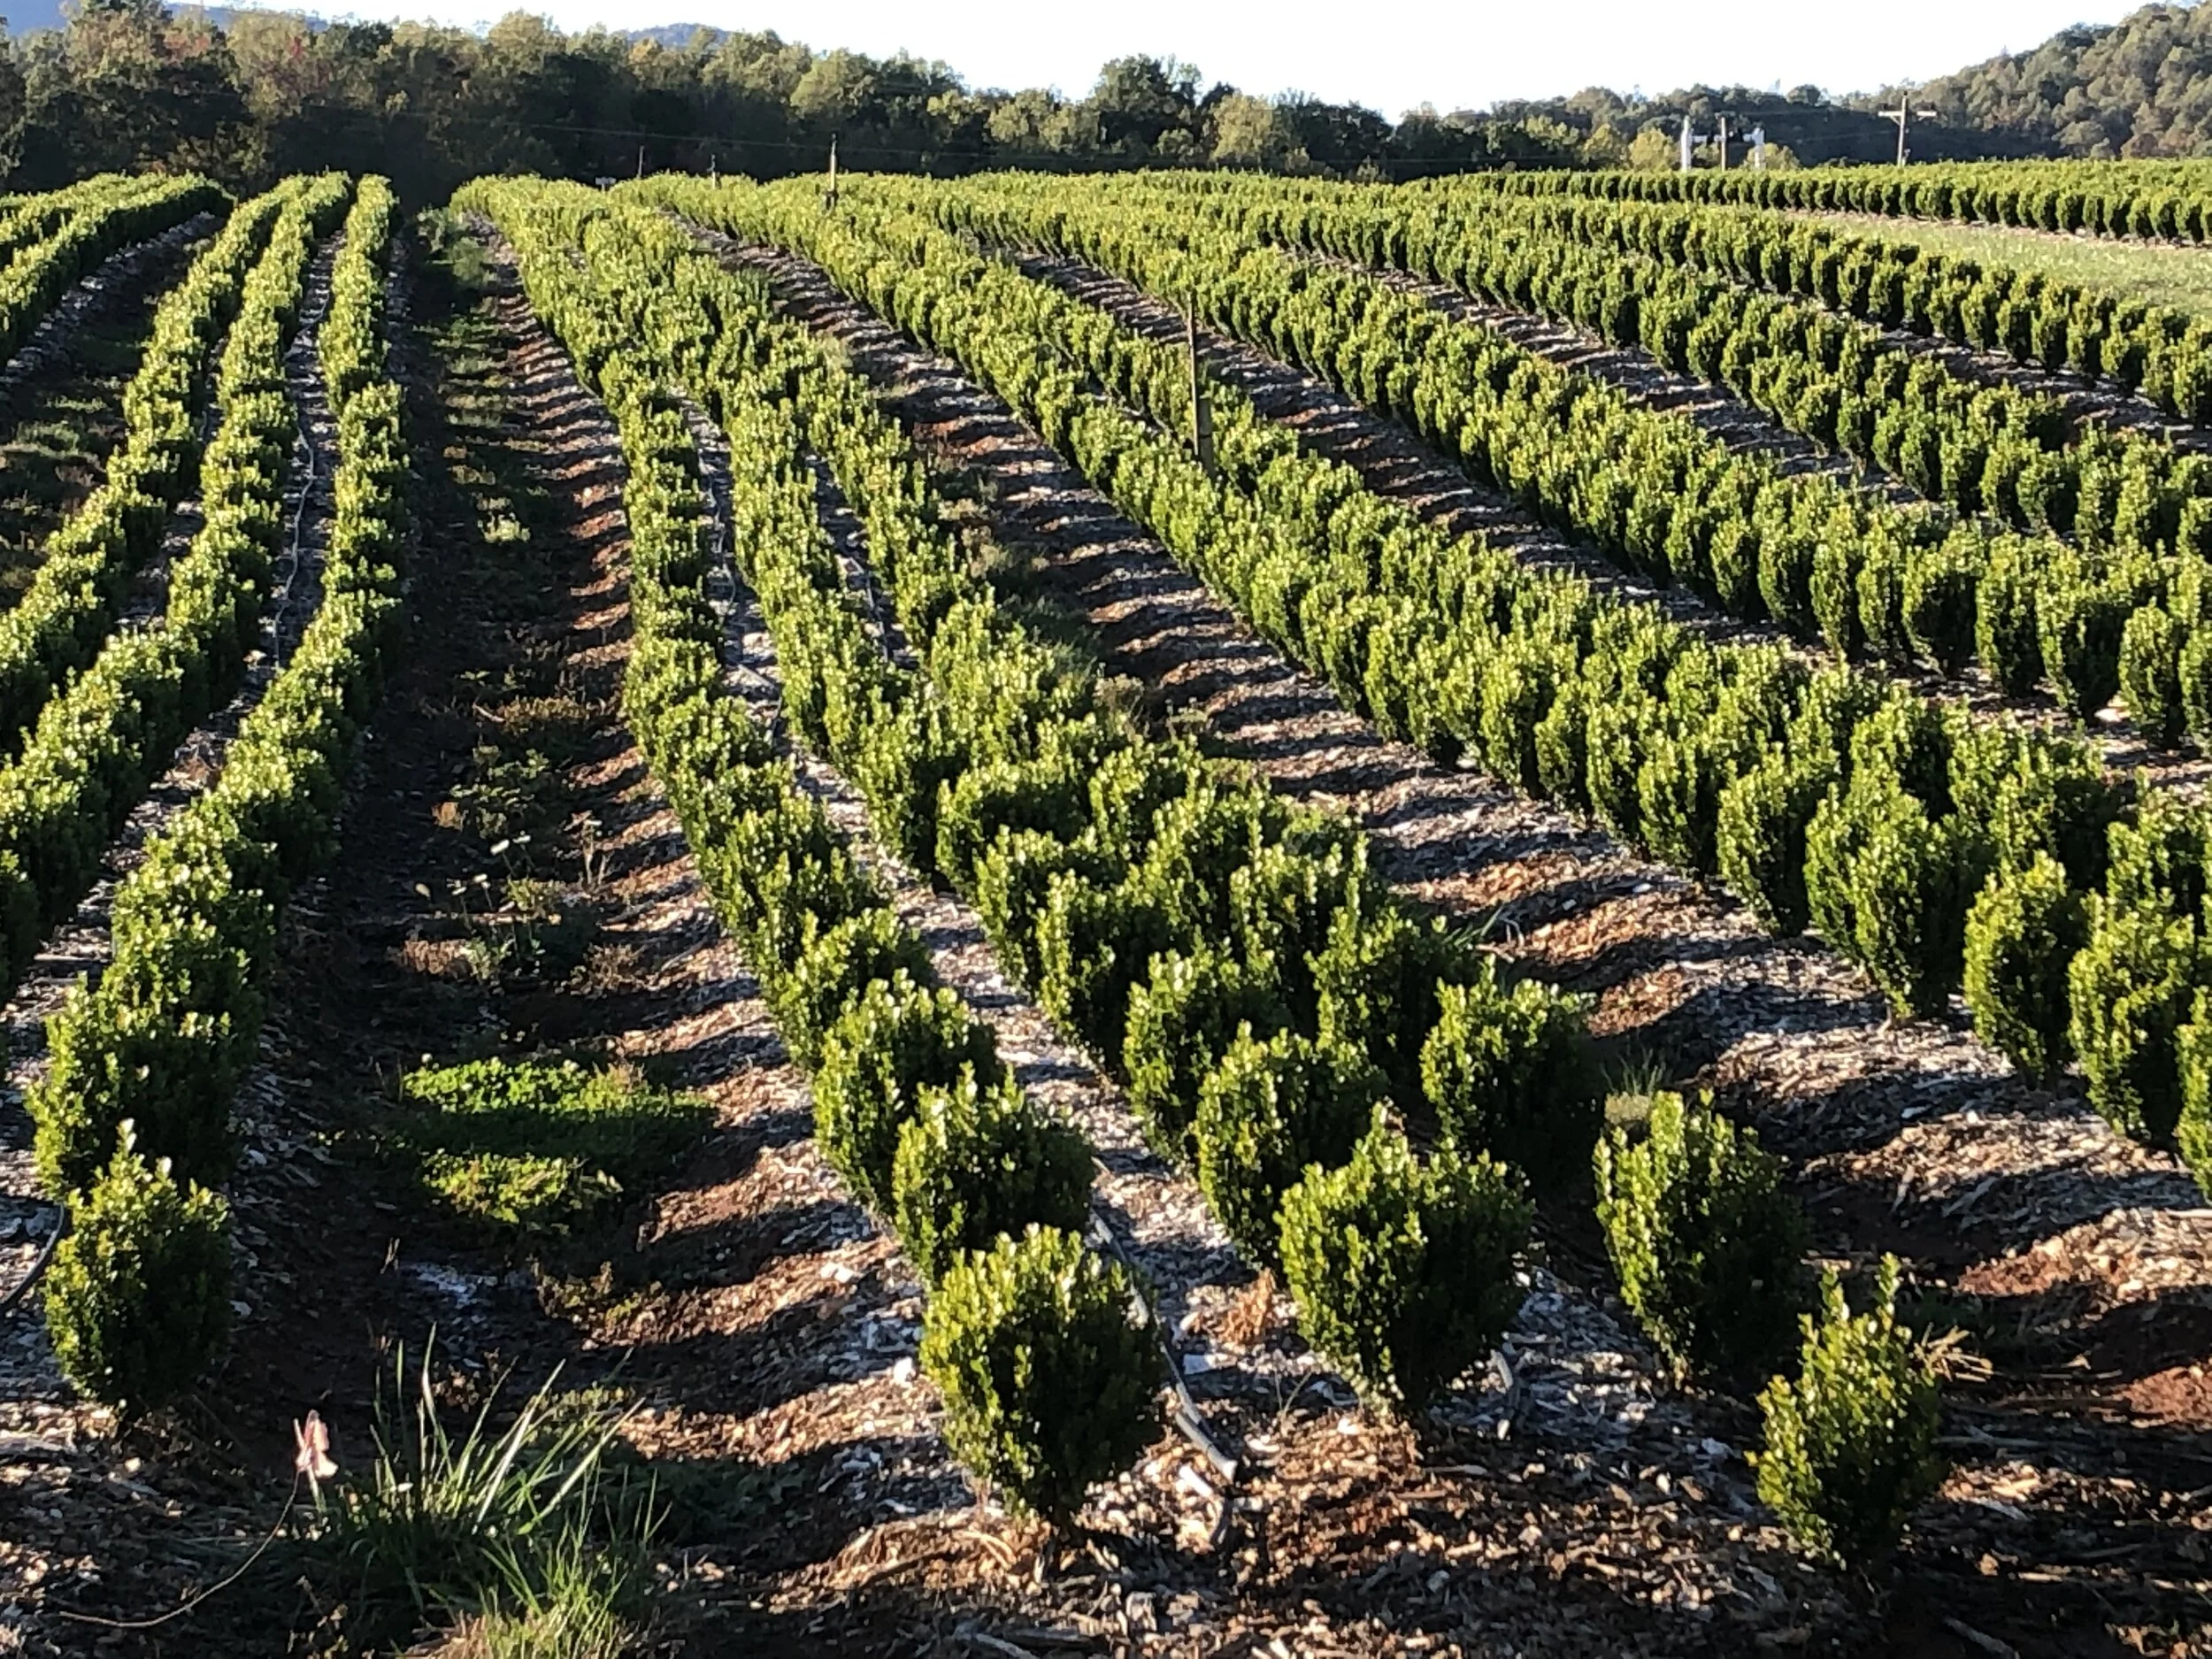
This hilltop planting of boxwood would have minimal chance of Box Blight because of good air movement.

The heavy shading and limited air movement of these boxwood would make them more susceptible to Boxwood Blight.
Cultivar Selection


Choose the proper cultivar based on ultimate size and shape, growth rate, maintenance requirements, and sun exposure.
Before planting, envision what a boxwood garden will look like in 10-20 years. Know that the 10-year size of the boxwood will be so that you allow sufficient space for the boxwood to grow.
Take care to select the proper cultivar of boxwood. Consider the ultimate desired size, shape, and growth rate. Remember to anticipate maintenance requirements, the climate, and the sun exposure of the site. Consider the timing and intensity of sun in the area to be planted. All boxwood will do well in shady areas, but too much shade and little air movement can make a site susceptible to Boxwood Blight. Some of those same cultivars will also do well in part-sun or sunny locations. Sunny locations are those areas with bright sun from morning to afternoon. Part-sun locations are shaded from morning to afternoon but may receive direct sun anytime during the day. Shady locations typically receive little or no direct sun.
Generally speaking, all boxwood prefer some afternoon shade. Some cultivars of boxwood will bronze in winter more than others. To lessen winter bronzing, avoid direct afternoon sun exposure from the southwest. Refer to information on each cultivar for recommendations regarding exposure and winter bronzing due to sun exposure.
Drainage

These raised beds are ready for new boxwood plantings. It is very important that boxwood are planted “high” to avoid water pooling around the roots.
Avoid planting in areas with poor drainage.
Avoid areas with significant standing water after heavy rains.
Water for plants is a double-edged sword. While it is essential that a boxwood have sufficient water, too much water is a deadly enemy. When choosing a site, it is especially important to avoid areas with standing water, outlets for gutters or other drains, or areas where soils tend to stay moist or wet year-round. Areas that collect excessive surface water, even subtle areas that water drains to without properly releasing, are very detrimental to the long-term success of a boxwood planting.
If you are unsure of the inherent ability of a soil to properly drain, dig a one-foot deep hole in several potential sites in a landscape. After a 2-inch rain, examine how much water stays in those holes compared to other areas in the same landscape. The best long-term sites, particularly in heavy soils, are the ones that drain the fastest.
Some cultivars are more tolerant of areas with questionable drainage. In general, the Buxus sempervirens cultivars are the most sensitive to excess water, and are known to frequently succumb to Phytophthora, or root rot, when grown in wet areas. Be particularly careful to plant B. sempervirens cultivars in well-drained sites where they are elevated from any standing water or drainage outlets. Poor drainage is one of the leading causes of problems in boxwood. If a site does have drainage issues, the Buxus microphylla cultivars tend to tolerate wetter conditions slightly better. Generally speaking, avoid planting boxwood where known drainage problems exist.

Roots show signs of Phytophthora root rot as the outer layer is brittle and sloughs off when gently pulled.

Symptoms of Phytophthora include straw colored leaves on branches or sections of a boxwood.
Soil Preparation

Fertile, well-drained soils are a key component of growing a beautiful boxwood.
Test the soil for pH and fertility, and add lime and fertilizer as recommended.
If soil is deficient of nutrient-rich topsoil, amend by adding organic matter in the form of aged bark, compost, peat moss, or other soil amendments.
Proper soil preparation is essential to ensure long term success with any planting. Perform a soil test in advance of any bed preparation. Based on the results of the soil test, modify the soil to achieve a pH in the range of 6.5 to 7.0. Add fertilizer as recommended from a soil sample test.
In areas that have had considerable grading or renovation with heavy equipment, particularly in areas of housing developments, pay close attention that sufficient topsoil has not been removed. In an area that is void of topsoil, renovation of the soil will improve drainage, reduce compaction issues, add organic matter, and encourage root growth. Renovations of existing areas or new plantings should include removal of unwanted existing plants and debris, the incorporation of soil amendments, and soil mixing. Mix soil to a minimum depth of 10-15 inches and add amendments. Good examples of soil amendments include compost and aged poultry or other manures to increase organic matter and nutrients. Mix soil and amendments thoroughly.
Planting
These boxwood are planted in raised beds to help with drainage and prevent water pooling around the roots.
Plant the boxwood so that the top of the root ball is about 2 inches higher than surrounding soil surface.
Fall is a great time to plant so roots can take advantage of fall, winter, and spring precipitation before summer droughts.
Once you prepare the bed and dig the hole, place the plant in the hole remembering to keep about 2 inches of the root ball above the original soil surface. Backfill the hole with the amended rich soil. Mound the soil up to the edges of the root ball and lightly pack it to avoid leaving any air pockets. Air pockets and loose soil around the root ball tend to make the plant dry out quickly. Ensure that the plant remains elevated and does not settle with time.
Digging the Proper Hole:
Dig the hole twice (or more) as wide as the root ball. Dig the hole so that about 2 inches or so of the root ball is above the original soil surface and the base of the root ball is sitting on the undisturbed soil. Planting the boxwood high helps to ensure proper drainage. If the soil is highly compacted, take extra steps to be sure the soil drains properly, and water moves easily through the soil. Never plant boxwood level with the soil surface, as the plant generally sinks with time as the planting area settles. Take care when the soil has been disturbed below the root ball to ensure that the plant remains elevated and settles minimally with time.
Mulching
Mulching is an outstanding practice for many good horticultural reasons.
Do not over-mulch. Add 1” the first year but no more that 1/2” in subsequent years.
Mulching is an outstanding cultural practice ensuring lower incidence and spreading of Boxwood Blight, retention of moisture during dry summers, cooler root temperatures during hot weather, suppression of weeds, increased organic matter benefits, and insulation of roots in Winter. After planting, add about 1 inch of your choice of mulch, including pine needles, hardwood or softwood bark or chips, or another organic source. Use a mulch that has been properly aged. If the mulch is “green” or freshly harvested or ground, it draws nitrogen from the soil and the boxwood will not get its proper rich green color. Additional nitrogen in the form of fertilizer should be added if this occurs. If the mulch is properly aged, it slowly adds an organic source of nitrogen to the soil and the boxwood is happy!

A freshly mulched bed of NewGen Freedom® with some annuals and perennials.
One of the biggest benefits of mulching is minimizing the incidence and severity of Boxwood Blight if it is ever introduced into a boxwood planting. One of the primary ways that Boxwood Blight spreads is through spores splashing from puddles of infected leaves on the ground under the lower leaves of a boxwood. These splashed spores land on the lower leaves of a neighboring plant, and suddenly the new plant is infected. If a plant is properly mulched, there will be minimal splashing and the water will be simply absorbed through the mulch into the ground.
The other way that mulching minimizes Boxwood Blight is by creating a physical barrier between the infected leaves and the lower limbs of a boxwood. If a plant has Boxwood Blight in any given year, the infected leaves fall or blow to the ground. To physically cover those leaves and prevent spores from traveling to new plants, it is recommended that a light layer of mulch be added every year, preferably during the early Spring. After mulching a boxwood at planting, subsequent mulching should be limited to no more than ½ inch, thereby getting all the benefits of mulching without suffocating the boxwood.
Watering

Water thoroughly at time of planting.
Pay close attention to moisture levels during hot and dry summers, particularly during the boxwood’s first summer.
Do not overwater. Boxwood tend to be fairly drought tolerant.
A thorough soaking at the time of planting is the most important watering a boxwood will ever have. Be sure the entire root zone is thoroughly wetted. Afterwards, periodic watering on an as-needed basis is best. Allow the root zone to begin to dry before re-watering.
It generally takes about 18 months for a boxwood to acclimate to a new site, at which time almost no irrigation should be needed except during extreme droughts. During the first 18 months after planting, monitor the plant for adequate moisture, particularly during the dry summer months. Approximately 1 inch of natural precipitation or irrigation per week during the hot summers or extreme drought periods best insures healthy boxwood.
Do not forget to monitor your boxwood moisture levels during the winter, particularly new plantings. Maintaining proper moisture to lessen root damage in severe cold encourages good root growth in times when the ground is not frozen. Boxwood continue to grow roots through the winter when temperatures are not extremely cold.
Never allow the plant to dry to the point of showing stress. When boxwood show stress due to lack of moisture, they seldom recover.